Global HR Articles Center
Feature: Transfer
Purpose:
- The Transfer feature in Global HR Cloud allows you to manage employee reassignments within your organization efficiently. Whether it’s a change in department, location, title, or even company, you can easily record and track transfers.
Key Points:
- Individual or Bulk Transfers: Manage transfers for single employees or import data for multiple transfers using an Excel template.
- Detailed Tracking: Record essential information like order date, effective date, transfer type (internal, external, temporary), new company/department, and remarks.
- Flexible Data Management: Choose specific data points to update during the transfer process through the “ Choosing Columns” option.
- Easy Reporting: Generate Excel reports based on selected timeframes and employees to analyze transfer trends or retrieve specific data.
Step-by-Step Guide:
- Single Employee Transfer:
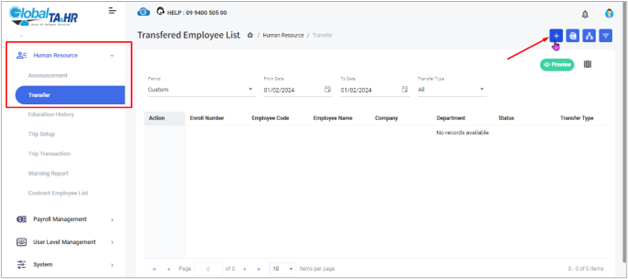
- Go to Left Menu Panel > Human Resource > Transfer.
- Click “+ Add New”.
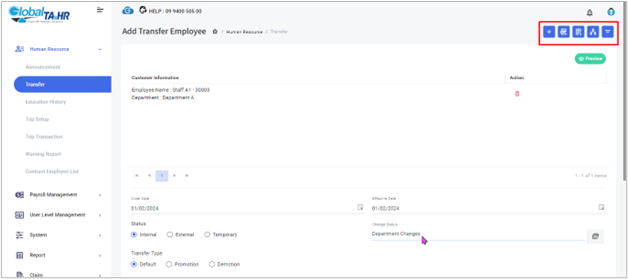
- Choose the employee using Filter by Employee or Organization Structure.
- Click Preview to confirm the employee selection.
- Fill in the transfer details:
- Order Date: Date the transfer is initiated/approved.
- Effective Date: Date the transfer takes effect.
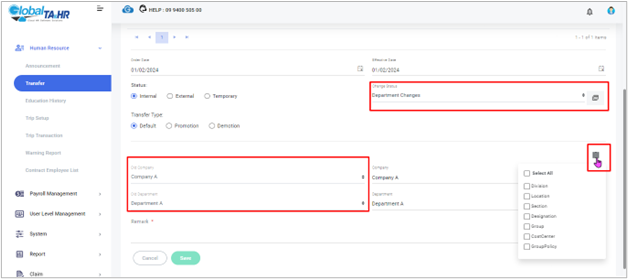
- Status: Internal (within department/business), External (to another company), or Temporary (duration defined in Change Status).
- Change Status: Create and choose a “ Change Status” name specific to this transfer type.
- Company and Department: Select the new company and department (default values can be changed through “ Choosing Columns” ).
- Choosing Columns: Check additional data points like division, location, section, designation, group, or cost center you want to change.
- Remark: (Optional) Add any relevant notes about the transfer.
- Click Save to complete the single-employee transfer.
- Multi-Employee Transfer (Excel Import):
- Follow steps 1-2 from the single employee transfer.
- Click the “Download Template” icon to download the Transfer Excel Template.
- Fill in the template with transfer data for multiple employees, ensuring mandatory columns like Enroll Number, Employee Code, Employee Name, Order Date, Effective Date, Status, Change Status, Old Company, and New Company are complete.
- Click the “Import Excel” icon.
- Browse and select the completed Excel file.
- Click Validate Data to check for errors.
- Once validated, click Import to complete the bulk transfer.
- Exporting Transfer Data:
- Go to Left Menu Panel > Human Resource > Transfer.
- Choose a Period for the report.
- Select the staff using Filter by Employee or Organization Structure.
- Click Preview to see the filtered employee list.
- Click “Export Excel” to download the data in an Excel report format.
Additional Tips:
- Review the transfer process steps before moving employees.
- Ensure all mandatory fields are filled correctly during individual or bulk transfers.
- Utilize the “ Choosing Columns” option to update specific data points for each transfer efficiently.
- The Transfer feature helps maintain accurate employee records and simplifies employee movement within your organization.
Screenshots: