Global HR Articles Center
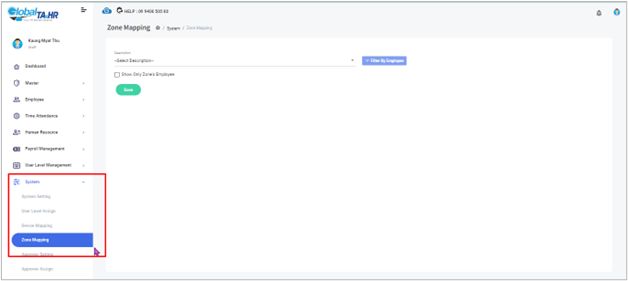
Feature: Zone Mapping
Purpose:
- This guide explains how to assign employees to designated zones in Global HR Cloud, enabling location-based attendance tracking and access control.
Key Points:
- Zone mapping links specific zones to individual employees.
- Zones can represent physical locations or virtual boundaries.
- Filter employees for efficient mapping.
- View existing zone mappings based on file type.
Step-by-Step Instructions:
- Accessing Zone Mapping:
- Open the Global HR Cloud web URL in your browser.
- In the left menu panel, go to “System” and select “Zone Mapping”.
- Mapping Zones:
- Choose the desired zone from the Description list.
- Click Filter By Employee to select specific employees.
- Check the boxes next to the desired employees.
- Click Select.
- Click Save to complete the mapping.
- Additional Options:
- Show Only Zone’s Employee: View employees already mapped to the selected zone by choosing its file type.
- Important Notes:
- Zone Configuration:
- Contact the Global HR Cloud Operator Team or Service Team for initial setup.
- Provide the zone location details.
- Alternatively, create zones under “Master” >> “GPS Location”.
- GPS Location Creation: Create GPS locations before zone mapping.
- Zone Configuration:
Remember:
- Zone mapping is essential for accurate location-based attendance and access control.
- Create GPS locations before defining zones.
Screenshots: