
Global HR Articles Center
Feature: Master
Purpose:
This guide explains how to set up and manage master data in Global HR Cloud, including company profiles, departments, grades, designations, teams, labels, leave types, keywords, public holidays, and GPS locations.
Key Points:
- Master data forms the foundation for your employee data and processes.
- You can set up data manually or import it from an Excel file.
- Different access levels have different permissions for creating and editing master data.
- You can add holidays manually or generate them automatically based on default or government settings.
Step-by-Step Instructions:
- Accessing Master:
- Log in to Global HR Cloud web software.
- Go to “Master” in the left menu panel.
- Company Profile:
- To create a new company:
- Click “Add New”.

- Provide company details like “name”, “email”, “phone”, “fax”, “address”, “website”, “SSB Register No.”, “leave period”, “budget period”, and payment settings.
- Check on or off for “Use this Company as Default”.
- Generate employee numbers (optional).
- Click “Save”.
- Click “Add New”.
- To edit or delete a company:
- Locate the company in the list.
- Click the “Edit” or “Delete icon” .
- Make changes or confirm deletion.
- Screenshots :
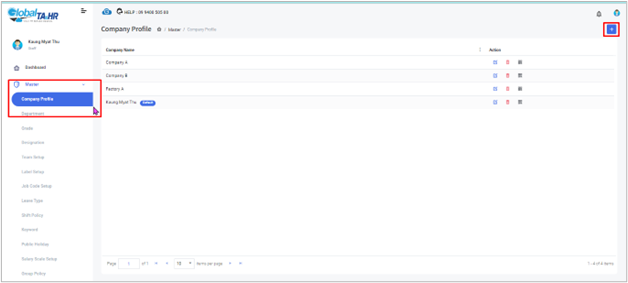
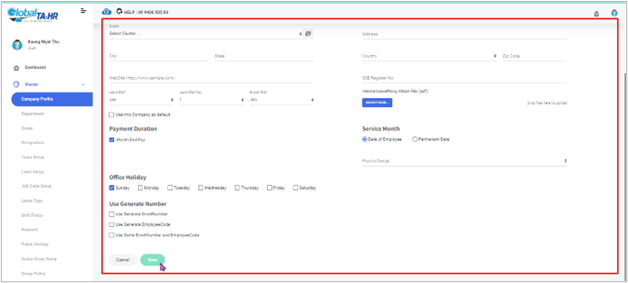
- To create a new company:
- Department:
- To create a department:
- Click “Add New”.
- Enter department details like “short code”,” name”, “order”, “company”, “parent department”, “shift”.
- Check on or off for “Use this department as Default”.
- Click “Save”.
- Click “Add New”.
- You can also import departments from an Excel file.
- Screenshots :
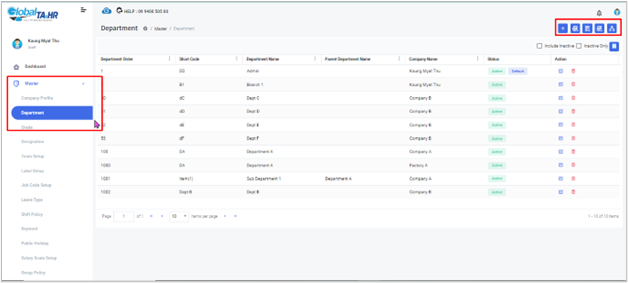
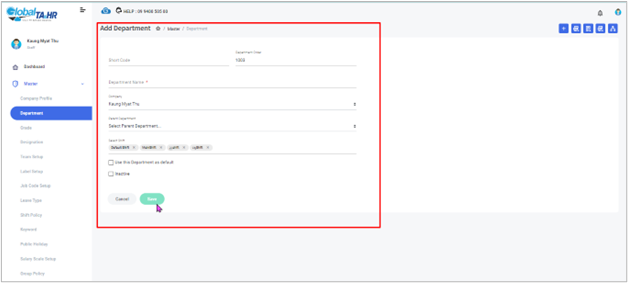
- To create a department:
- Grade:
- To create a grade:
- Click “Add New”.
- Enter grade details like “name”, “order”, “upper grade”
- Choose “Default”, “Topmost (optional)”.
- Click “Save”.
- Click “Add New”.
- You can also export a list of grades to Excel.
- Screenshots :
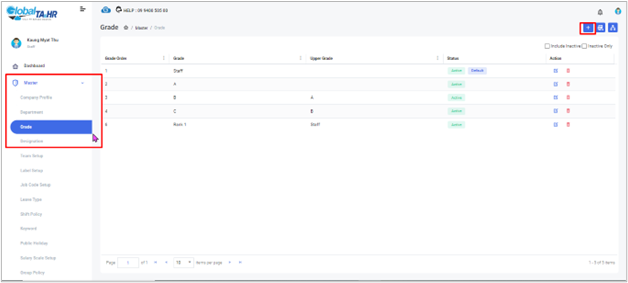
- To create a grade:
- Designation:
- To create a designation:
- Click “Add New”.
- Enter designation details like “short code”, “name”, “order”, “grade”
- Choose “Use this Designation as default” (optional).
- Click “Save”.
- Click “Add New”.
- You can also import designations from an Excel file or watch a video tutorial.
- Screenshots :

- To create a designation:
- Team Setup:
- To create a team:
- Click “Add New”.
- Enter team details like name, description, product, and type (Team or Project).
- Choose “Inactive” if not currently used.
- Click “Save”.
- Click “Add New”.
- You can also export a list of teams to Excel.
- Screenshots :
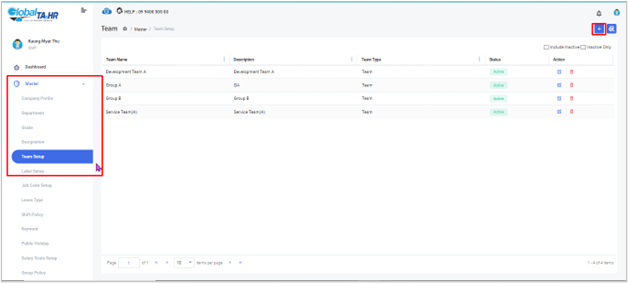
- To create a team:
- Label Setup:
- To create a label:
- Click “Add New”.
- Enter label details like name, description, type (Claim, Leave, OT, etc.)
- Choose “Inactive” if not currently used.
- Click Save.
- Click “Add New”.
- Screenshots :
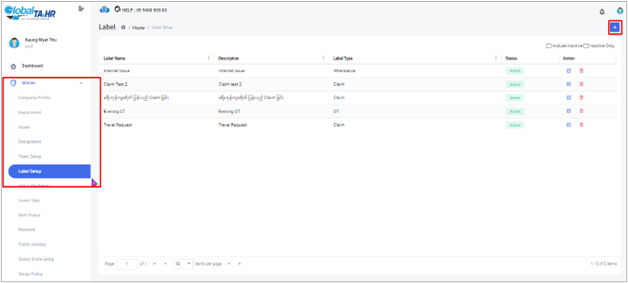
- To create a label:
- Leave Type:
- To create a leave type:
- Click “Add New”.
- Enter leave type details like “short code”, “name”, “Gender Option”(Maternity Leave for Female, Paternity Leave for Male), “Use reason mandatory”, “file attachment option”, and “import-only” option.
- Choose “Inactive” if not currently used.
- Click Save.
- Click “Add New”.
- Screenshots :
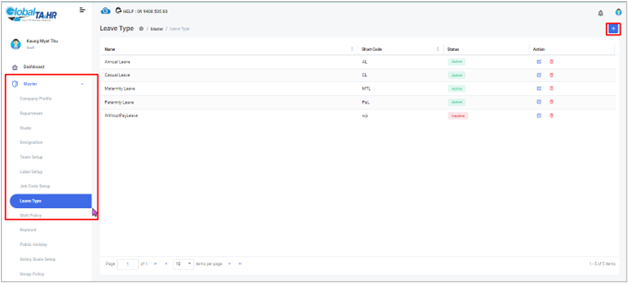
- To create a leave type:
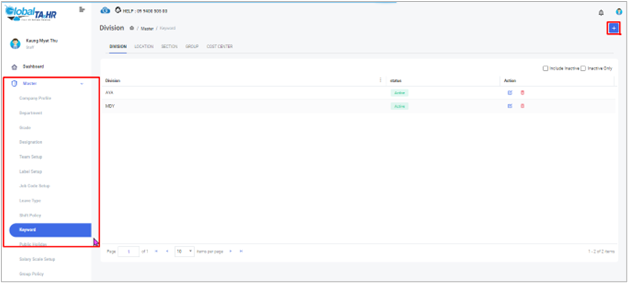
- Keyword:
-
- This category includes various options like Division, Location, Section, Group, and Cost Center.
- Each option has its own setup process similar to creating departments, with details specific to each category (location name, group name, etc.).
-
-
-
- Click “Add New”.
- Write “Name”
- Choose “Default”(option)
- Choose “Inactive” if not currently used
- Click “Save”.
- Click “Add New”.
-
-
- Screenshots :

-
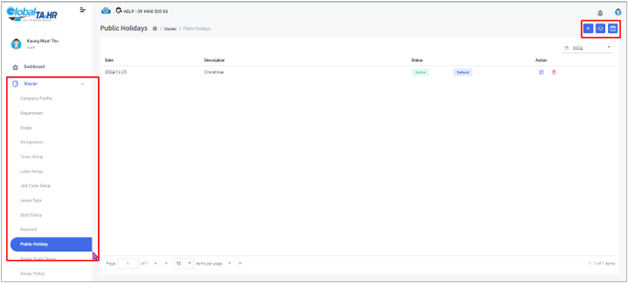
- Public Holiday:
- To create a Public Holiday:
- Manually Adding a Public Holiday:
- Click the “Add New”.
- Choose “Date” or “Date Range”.
- Enter the Date (for a single-day holiday) or set the Start Date and End Date (for a date range).
- Provide a “Description” (name of the holiday).
- Optionally, select Use this holiday as default for holidays with fixed dates.
- Click “Save”.
- Click the “Add New”.
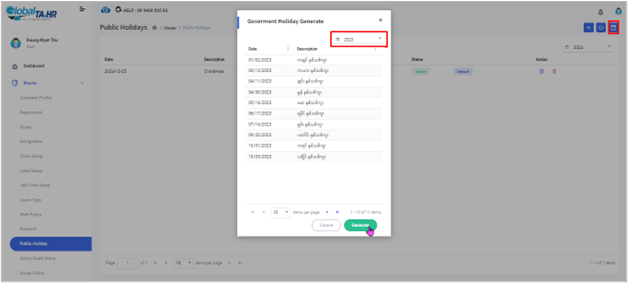
- Generating Public Holidays:
- From Default Option:
- Click the “Generate icon”.
- Enter the Generate Year or use the calendar to select it.
- Click “Generate”.
- From Government Holiday:
- Click the “Government Holiday icon”.
- Click “Generate” to set dates and descriptions based on government settings.
- From Default Option:
- Viewing Old Public Holiday Records:
- Use the Calendar choose box to select the desired year.
- Screenshots :

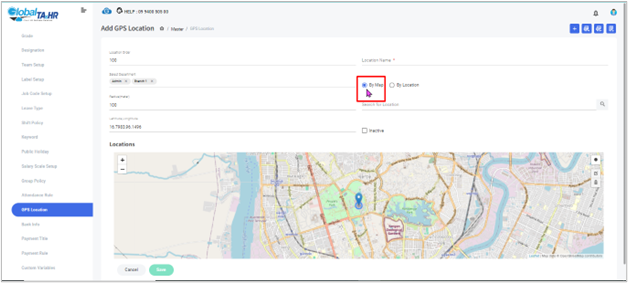
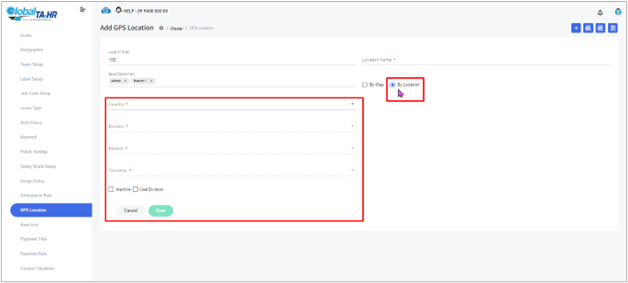
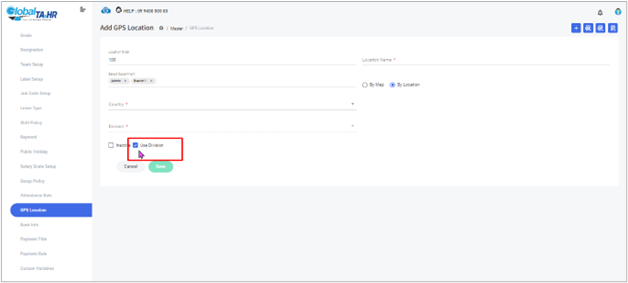
- GPS Location:
- To create a GPS location:
- Click “Add New”.
- Choose location method (By Map or By Location).
- If using “By Map”, search for and select the “location”, set the “radius”.
- If using “By Location”,
- Choose “Division” method (Use Division or Not Use Division)
- If not using “Division”, search for and select “country”, “division”, “district”, and “township”.
- If using “Division”, search for and select “country”, “division”.
- Click “Save”.
- Click “Add New”.
- You can also import GPS locations from an Excel file.
- Screenshots :
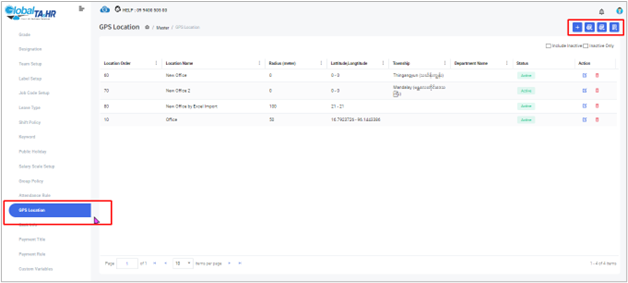
- To create a GPS location:
Additional Information:
- Experiment with different setup options to find the most efficient configuration for your organization.
- Regularly review and update your Master data to ensure accuracy and alignment with your current needs.