Duty Roster
Duty Roster ဆိုတာ ဘာလဲ?
လုပ်ငန်းတစ်ခုတွင် ၀န်ထမ်းတစ်ယောက်ချင်းစီအား သက်ဆိုင်သော သီးခြားတာ၀န်များ နှင့် အလုပ်များပေါ် မူတည်၍ Shift (အလုပ်အဆိုင်းအမည်)များကို တာ၀န်အချိန်ဇယားတစ်ခု အနေနဲ့ သတ်မှတ်ပေးနိုင်သည့် နေရာဖြစ်ပါသည်။
Duty Roster Function ကို အသုံးပြုဖို့ ဘာတွေကို မဖြစ်မနေ တည်ဆောက်ထားဖို့လိုသလဲ?
Duty Roster ကိုအသုံးပြုရန် Shift Policy တွင် Shift များကို ကြိုတင်သတ်မှတ်ပေးထားရမည်။
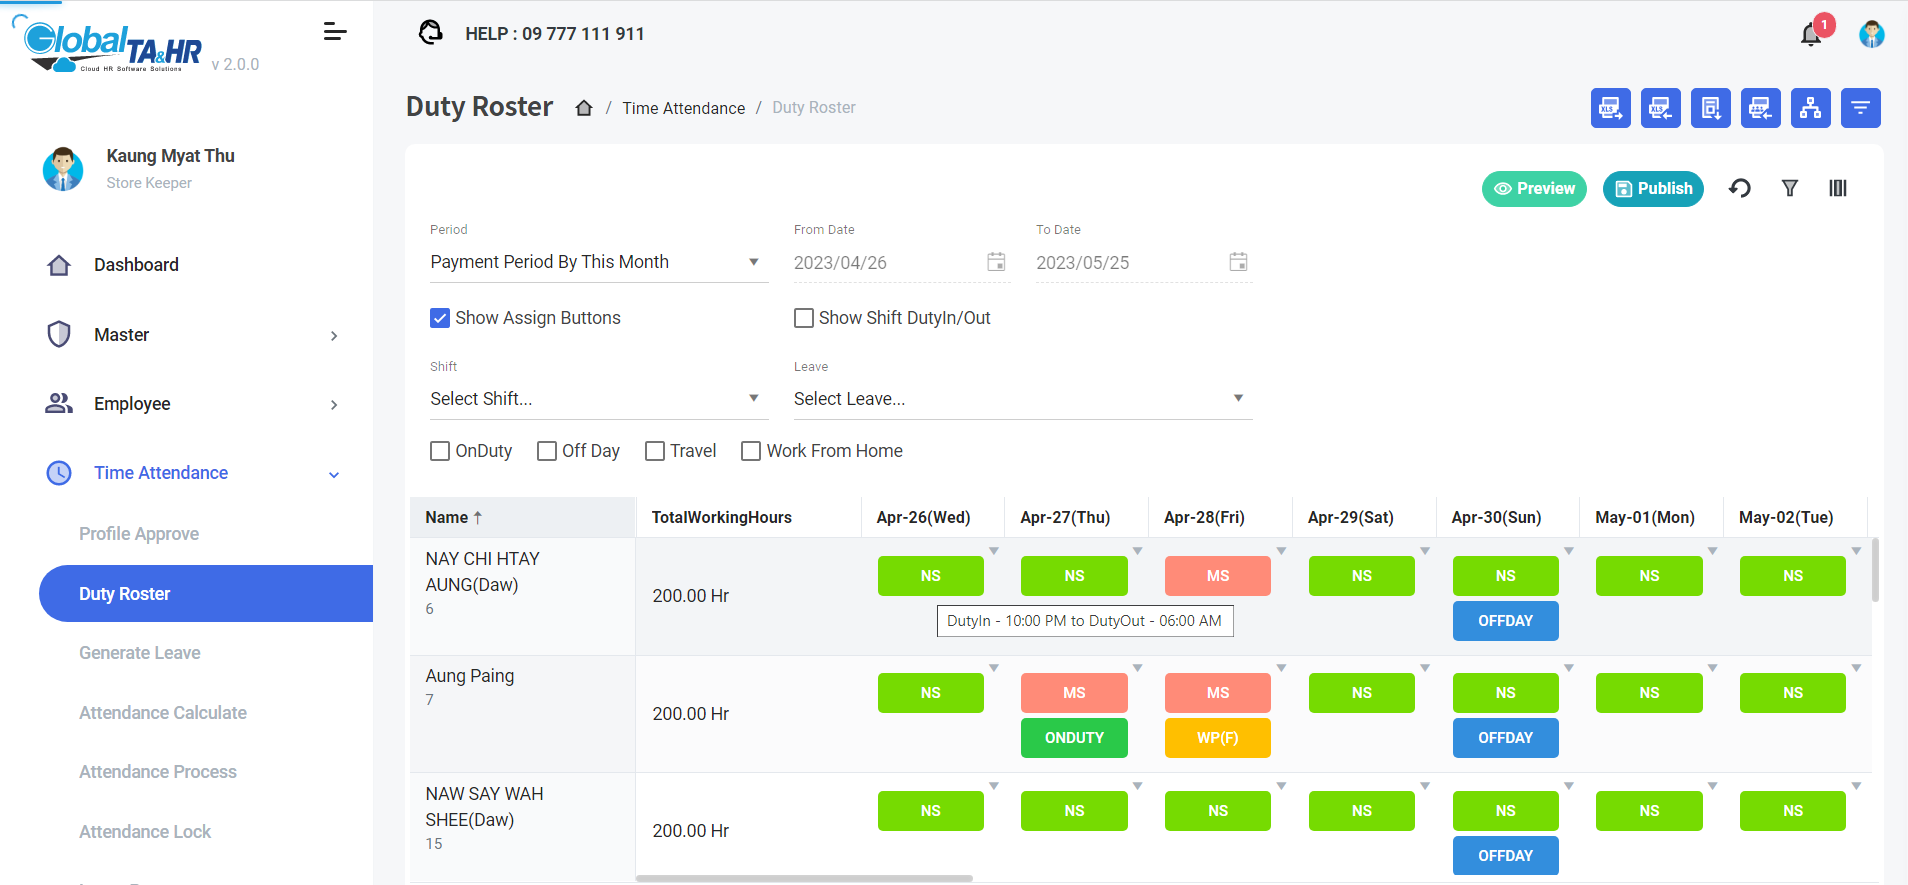
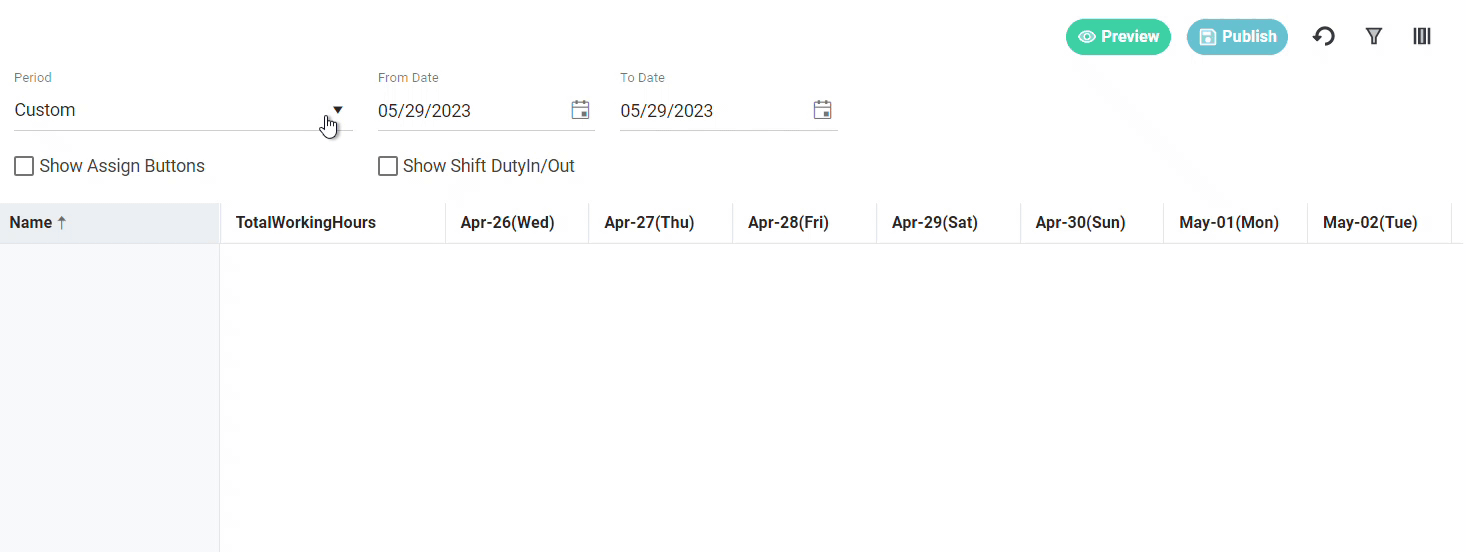
အလုပ်အဆိုင်းများကို စီမံခန့်ခွဲမည် ဖြစ်တာကြောင့် Shift Policy တွင် အလုပ်မှာ ရှိသည့် သတ်မှတ်ထားသော Shift (အလုပ်အဆိုင်းအမည်) များ ကို အရင်သတ်မှတ်ဖို့လိုပါသည်။ သို့မှ သာ အောက်ဖော်ပြပုံ- Duty Roster Form တွင် တွေ့ရသလို နေ့အလိုက် မည်သူသည် မည်သည့် အလုပ်အဆိုင်းနှင့် လုပ်ဆောင်နေသည်ကို အလွယ်တကူ သိနိုင်ပါသည်။
Duty Roster Function တွင် ဘာတွေပါ၀င်မလဲ?
Tips for Icons
1 – အချိန် ကာလ ကို ရွေးချယ်သတ်မှတ်ရန် : Period
2 – ရွေးချယ်ထားသော ၀န်ထမ်း၏ အလုပ်အဆိုင်း (Shift) များကို ဖော်ပြရန် : Preview ![]()
3 – အလုပ်အဆိုင်းများကို ထုတ်ပြန်ခြင်း : Publish ![]()
4 – အစကပြန်စခြင်း: Reset Default ![]() (Remark: Publish မလုပ်ခင် Duty shift များ မှားထည့်မိတာများကို အရင် Duty shift တွေအတိုင်း ပြန်ဖော် ပေးပါမည်။ Publish လုပ်ပြီးသွားပါက မရပါ။)
(Remark: Publish မလုပ်ခင် Duty shift များ မှားထည့်မိတာများကို အရင် Duty shift တွေအတိုင်း ပြန်ဖော် ပေးပါမည်။ Publish လုပ်ပြီးသွားပါက မရပါ။)
5 – ရွေးချယ်သည့်နေရာကို ၀ှက်ထားခြင်း : Hide Search ![]() (Remark: အဆိုင်းဇယားကို အပြည့်ပုံစံ ပြခြင်းသို့ ပြောင်းလဲပြီး Period/Show Assign Buttons များကို ခေတ္တ ဖျောက်ထားပါသည်။)
(Remark: အဆိုင်းဇယားကို အပြည့်ပုံစံ ပြခြင်းသို့ ပြောင်းလဲပြီး Period/Show Assign Buttons များကို ခေတ္တ ဖျောက်ထားပါသည်။)
6 – Column များကို ရွေးချယ်ခြင်း : Choosing Column ![]()
7 – တာ၀န်အချိန်ဇယားကို Excel ဖိုင်ဖြင့်ထုတ်ခြင်း : Export Excel ![]()
8 – ပြုပြင်ထားသော တာ၀န်အချိန်ဇယား Excel file ကို ထည့်သွင်းခြင်း : Import Excel ![]()
9 – Import လက်ခံသည့် တာ၀န်အချိန်ဇယား Excel ပုံစံ(Template) ကို Download ရယူခြင်း : Download Template ![]()
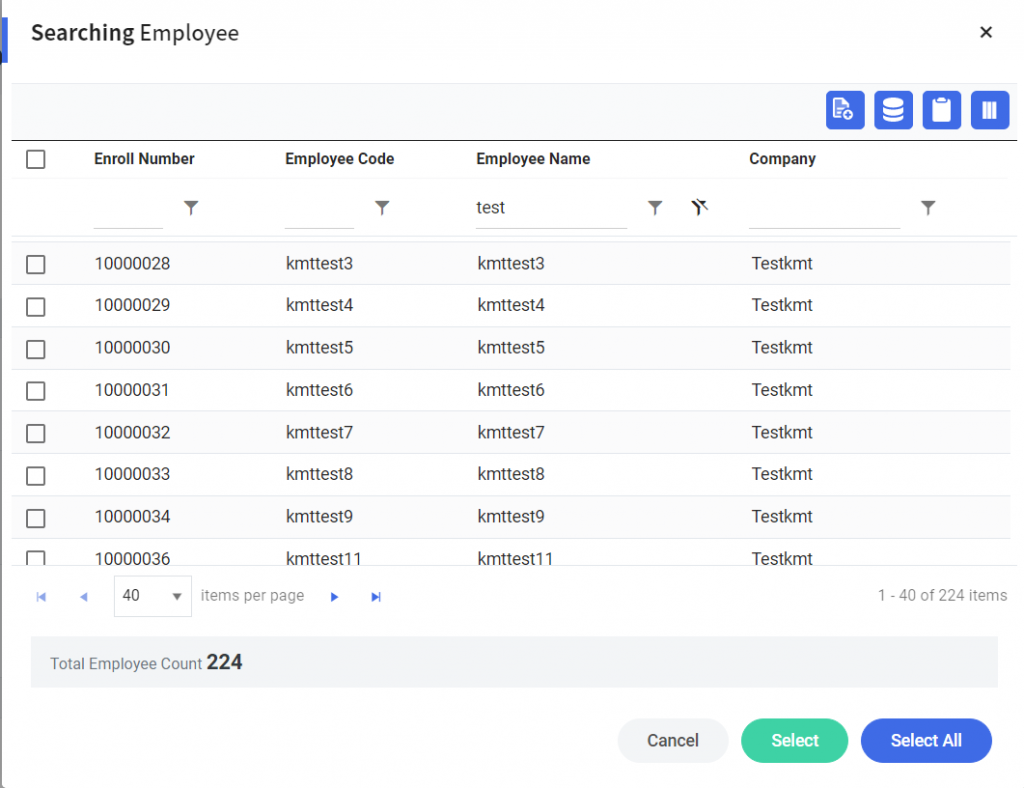
10 – ၀န်ထမ်းများကို Excel file နှင့် ရှာဖွေခြင်း : Select Employee by Excel ![]()
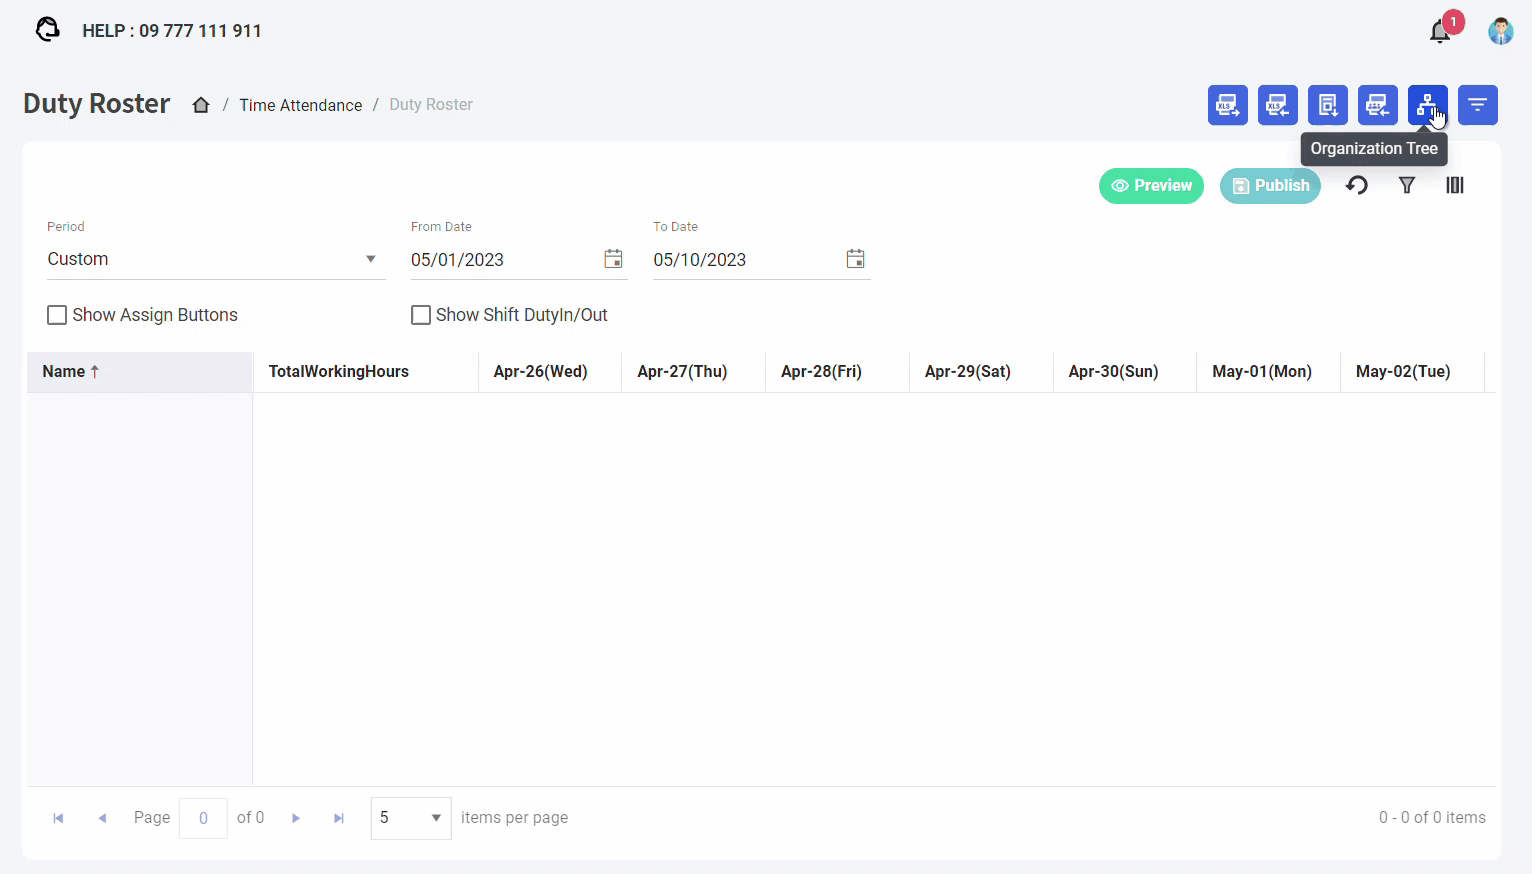
11 – ၀န်ထမ်းများကို Tree View အနေနဲ့ ရှာခြင်း : Organization Tree

Organization Structure-side panel ညာဘက်ထိပ် Three dots Vertical Icon ![]() = More Options တွင် Setup Menu အလိုက် View by နှင့် Resign/Inactive သမားများကို ပြန်လည်ရှာလို့ရသည့် View option များထပ်မံပါရှိပါသည်။
= More Options တွင် Setup Menu အလိုက် View by နှင့် Resign/Inactive သမားများကို ပြန်လည်ရှာလို့ရသည့် View option များထပ်မံပါရှိပါသည်။

12 – ၀န်ထမ်းများကို Filter Pop-up box နဲ့ ရှာခြင်း : Filter by Employee
13 – သတ်မှတ်ရန် ပြသသည့် ခလုတ် : Show Assign Buttons
![]()
14 – တာ၀န် အချိန် ၀င်ချိန်နဲ့ ထွက်ချိန်များကို ပြသခြင်း : Show Shift Duty In/Out
![]()
15 – Next Page > and Last Page >၊ ![]()
First Page ၊< and Previous Page < ![]()
Items per page ![]()
Tips: Duty Shift များကို ရွေးချယ်ပြီး Publish လုပ်သည့် အခါ ဖော်ပြထားသည့် items per page ပေါ် မူတည်ပြီးသာ ပြောင်းမည်ဖြစ်ပါသည်။
Duty roster Assign ချရန် နည်းလမ်းများ?
Duty roster ကို ပုံစံ ၃ မျိုးဖြင့် Assign ချလို့ရပါသည်။
- Show Assign Buttons ကို ရွေးချယ်ပြီး Assign ချခြင်း
- Shift တခုစီကို နိုပ်ပြီး Pop-Up Box တွင် Assign ချခြင်း
- Excel ဖြင့် import လုပ်ပြီး Assign ချခြင်း
Duty Roster Assign Setup
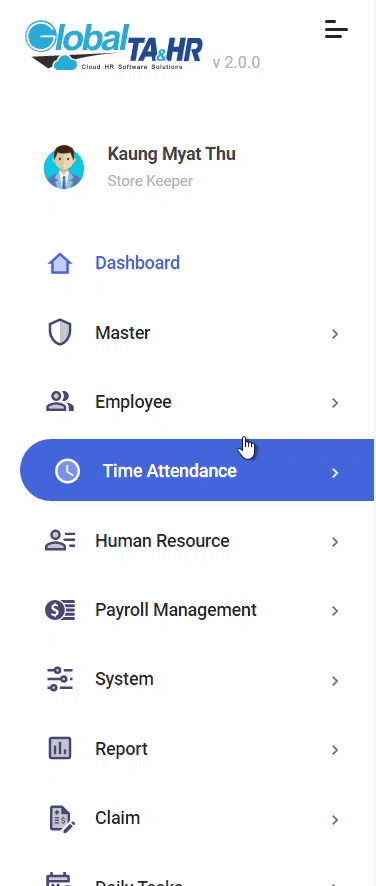
Go to Left Menu Panel >> Find and Click Time Attendance >> Click Duty Roster
Essential Steps(1 & 2)
In Duty Roster Page:(Time Attendance>Duty Roster)
Step 1 – Choose Period > Today / This week / This Month / Last Week / Last Month / Custom / Payment Period by this month
Step 2 – Choose Employee by Organization structure or Filter by Employee >> Click Preview Button
Method 1: Assign by Show Assign Buttons
After doing Essential Step 1 & 2;
Step 1.1 – Click the checkbox ![]() Show Assign Buttons(The name is where under the Period)
Show Assign Buttons(The name is where under the Period)
Step 1.2 – To Assign the Date, you just need to do
- Choose Shift Name in Select Shift… Drop-down Box
- Choose Leave Name in Select Leave… Drop-down Box
- Click the checkbox
![]()
**You must need to choose the Shift Name**
**If you want to assign an off day to a working day, uncheck the checkbox Off Day**
**If you want to assign the Leave day to a working day, choose “Select Leave” in drop-down box**
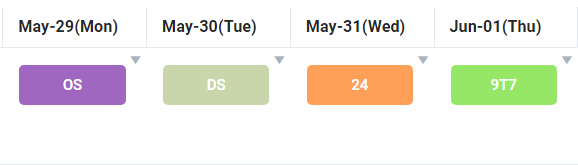
Step 1.3 – After choosing them, Click Shift Short Code Name Box under the date you want to change.
Step 1.4 – Click Publish after assigned Shift > Click Yes in Please confirm… Pop-up Box.
Sample Video…
Method 2: Assign by Pop-Up Window Box
After doing Essential Step 1 & 2;
Step 2.1 – Click Shift Short Code Name Box under the date you want to change.
**Don’t need to Click the checkbox ![]() Show Assign Buttons**
Show Assign Buttons**

Step 2.2 – In the Pop-up window Box, you just need to do
- Choose Shift Name in Select Shift… Drop-down Box
- Choose Leave Name in Select Leave… Drop-down Box
- Click the checkbox
![]()
- Choose Options in Assign Drop-down Box. Options are
-Doesn’t Repeat
-Daily
-Workdays(Don’t set for public holidays)
-Days off(Don’t set for workdays)
-Monday to Friday
-Custom →
-
- Every Monday
- Every Tuesday
- Every Wednesday
- Every Thursday
- Every Friday
- Every Saturday
- Every Sunday
- (After choosing the Custom day, need to Click Repeat)
Step 2.3 – After choosing them, Click Update.
Step 2.4 – Click Publish after assigned Shift > Click Yes in Please confirm… Pop-up Box.
Sample Video…
Additional options for Method 1 & 2
Name: Arrow-down icon ![]()
Location: Top right corner of Shift Short Code Name Box.
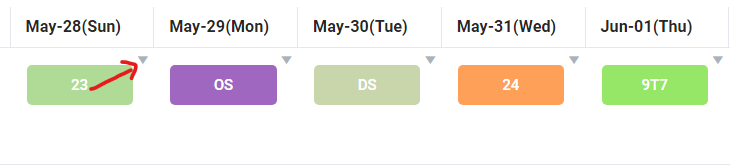
After clicking Arrow down icon:
- Reset (Copy this Assigned data ကို ဖြုတ်ခြင်း)
- Copy this assigned data ( Assigned data ကူးခြင်း)
- Cancel this assigned data (Assigned data ပယ်ဖျက်ခြင်း)
- Apply this row data to all employees. (အခု အတန်းလိုက်ရှိသည့် Assigned data အတိုင်း ၀န်ထမ်း အားလုံးသို့ သက်ရောက်စေခြင်း)
- Apply this column data to all employees. (အခု ဒေါင်လိုက်ရှိသည့် Assigned data အတိုင်း ၀န်ထမ်း အားလုံးသို့ သက်ရောက်စေခြင်း)
- View Roster Transaction (အလုပ်အဆိုင်းများ အပြောင်းအလဲကိစ္စကို ဖော်ပြခြင်း)
Remark: ယခု arrow down icon သည် Essential Step 1 & 2 ပြီးတာနဲ့ မြင်နေရမည်ဖြစ်ပါသည်။ အသုံးပြုသူတော်တော်များများသည် View Roster Transaction ကို အသုံးပြုကြပါသည်။
Sample Video…
Method 3: Assign by Excel Import
After doing Essential Step 1 & 2
Step 3.1 – Click the Download Template Icon ![]() (The Excel file will drop into the Download Folder.)
(The Excel file will drop into the Download Folder.)
Step 3.2 – Open the Downloaded excel template file named DutyRosterImportTemplate.
Step 3.3 – Fill the Duty Shift Assign Data with the short code name.
Important Tips: The import Excel will be validated only for the short code names from the system defined.
The short code names are;
- Shift short code
- Off day/Public Holiday short code
- Leave short code
- Shift short code
Shift short code name is created in Shift Policy Menu.
Sample: Main Shift = MS, Night Shift = NS
- Off day/Public Holiday short code
They are defined by the System.
They are Off day = Offday, Public Holiday = PH.
- Leave short code
Leave short code name is created in Leave Type Menu.
Sample: Casual Leave = CL, Earned Leave = EL
Step 3.4 – Click the Import Excel icon ![]() .
.
Step 3.5 – Click Browse File ![]() >> Find the file and Double click on the file or select the Import Excel data file and Click Open.
>> Find the file and Double click on the file or select the Import Excel data file and Click Open.
Step 3.6 – Click Validate Data.
Step 3.7 – Click Import Data
Sample Video…
Sample Template File : Dutyrostertemplatesample
**Excel import လုပ်ရာတွင် ခွင့်ရက်ရှိသောရက်များက Assign ကြိုဖြစ်နေပါက ခွင့်ရက်များကို အရင် ဖျက်ရမည်ဖြစ်ပါသည်။**
Assigned ချထားပြီးသော Duty Roster များကို Excel report ထုတ်လို့ရပါသလား?
Export Excel ဆိုသည့် icon ![]() ကို နိုပ်ပြီး report ထုတ်လို့ရပါသည်။
ကို နိုပ်ပြီး report ထုတ်လို့ရပါသည်။
Shift short code name အပြင် shift ၏ Duty in time/out time အချိန်များကို ပါ report ထုတ်ခြင်းပါက
![]() Show Shift DutyIn/out Check box ကို အမှန်ခြစ်ပေးရပါမည်။
Show Shift DutyIn/out Check box ကို အမှန်ခြစ်ပေးရပါမည်။
ဘာကြောင့် Duty Roster ကို သုံးသင့်သလဲ?
ဝန်ထမ်းများကို အချိန်ဇယားဆွဲခြင်းသည် လုပ်ငန်းတစ်ခုလုပ်ဆောင်သည့်အခါ အများဆုံး အသုံးပြုရသည့် အလုပ်များထဲမှ တစ်ခုဖြစ်ပါသည်။ လုပ်ငန်းနယ်ပယ်အသီးသီးတွင် Manpower(လုပ်သားအင်အား)ကို စီမံခန့်ခွဲခြင်းနှင့် စီမံဆောင်ရွက်ခြင်း၊ ထိရောက်သောလုပ်ငန်းဆောင်တာများကို လွယ်ကူချောမွေ့စေခြင်းနှင့် ကုန်ထုတ်စွမ်းအားကို ပိုမိုကောင်းမွန်အောင် ဆောင်ရွက်ခြင်းတို့တွင် အရေးကြီးသောအခန်းကဏ္ဍမှ ပါဝင်ပါသည်။ ထို့ကြောင့် Global TA & HR -Cloud HR Software solutions တွင် ပါ၀င်သော Duty Roster အသုံးပြုပုံ လမ်းညွှန်ချက်များကို လည်း စုစည်းဖော်ပြလိုက်ပါသည်။
Duty Roster Full Sample Video – Included all steps
Effects of using the Duty Roster
#Planning and organizing shift schedules
#Improving communication and coordination
#Reducing confusion and errors
#Facilitating time off requests
#Compliance and responsibility
တာဝန်များနှင့် အလုပ်များကို ခွဲဝေပေးခြင်း– ၀န်ထမ်းများအား တာဝန်များနှင့် အလုပ်များကို ခွဲဝေပေးရန် တာ၀န်အချိန်ဇယားတစ်ခုကို အသုံးပြုနိုင်ပြီး လိုအပ်သောတာဝန်အားလုံး ပြီးစီးကြောင်းနှင့် ၀န်ထမ်းတစ်ဦးစီသည် မိမိတို့၏တာဝန်များကို ရှင်းရှင်းလင်းလင်း နားလည်သဘောပေါက်စေရန် သေချာစေနိုင်ပါသည်။
ဆက်သွယ်ရေးနှင့် တာ၀န်အချိန် ညှိနှိုင်းမှုများကို ပိုမိုကောင်းမွန်စေခြင်း- တာ၀န်အချိန်ဇယားတစ်ခုသည် ဆက်သွယ်ရေးနှင့် တာ၀န်အချိန် ညှိနှိုင်းဆောင်ရွက်မှုကို ပိုမိုကောင်းမွန်လာစေပြီး ဝန်ထမ်းများအကြား သူတို့တာဝန်ယူရသည့် အချိန်နှင့် မည်သည့်လုပ်ငန်းတာဝန်များ လုပ်ဆောင်နေသည်ဆိုတာ မည်သူမည်ဝါ ဖြစ်သည်ဟု ရှင်းရှင်းလင်းလင်း နားလည်သဘောပေါက်စေပါသည်။
ရှုပ်ထွေးမှုများနှင့် အမှားအယွင်းများကို လျှော့ချခြင်း- ရှင်းလင်းပြီး အသေးစိတ်သော တာ၀န်အချိန်ဇယားကို ပေးခြင်းဖြင့်၊ ဝန်ထမ်းများသည် ၎င်းတို့မျှော်လင့်ထားသည့်အရာကို အတိအကျသိသောကြောင့် လုပ်ငန်းခွင်အတွင်း ရှုပ်ထွေးမှုများနှင့် အမှားအယွင်းများကို လျှော့ချပေးနိုင်ပါသည်။
အလုပ်အားလပ်ချိန်တောင်းဆိုမှုများကို လွယ်ကူချောမွေ့စေခြင်း- တာ၀န်အချိန်ဇယားသည် အလုပ်အားလပ်ချိန်တောင်းဆိုမှုများကို လွယ်ကူချောမွေ့စေရန်အတွက် အသုံးပြုနိုင်ပြီး ထို ပေးလိုက်သည့် အချိန်အတွင်း မည်သည့်ဝန်ထမ်းများ အလုပ်လုပ်နိုင်သည်ကိုလည်း ရှင်းလင်းသိသာစွာ ၎င်းသည် အထောက်အကူပြုပါသည်။
လိုက်နာမှုနှင့် တာဝန်ခံမှု- ဝန်ထမ်းများ၏ တာဝန်နှင့် အလုပ်ချိန်များကို မှတ်တမ်းတင်ခြင်းဖြင့်၊ တာဝန်အချိန်ဇယားတစ်ခုသည် အလုပ်သမားဥပဒေ၊ စည်းမျဉ်းများနှင့် ကုမ္ပဏီမူဝါဒများကို လိုက်နာမှုရှိစေရန် ကူညီပေးပါသည်။