Attendance Process
Attendance Process сАЖсАнсАпсАРсАмсАШсАмсАЬсА▓?
Attendance process сАЖсАнсАпсАЮсАКсА║сАЩсА╛сАм System сАЮсАнсАпсА╖ сАРсАнсАпсААсА║сАЫсАнсАпсААсА║сАЭсАДсА║сАЬсАмсАЮсА▒сАм Mobile App, Fingerprint Device, Bluetooth Device сАЩсА╗сАмсА╕сАЩсА╛ check in/out сАбсАБсА╗сАнсАФсА║сАРсА╜сА▒сААсАнсАп Form сАРсАБсАп сАбсАФсА▒сАФсА▓сА╖ тАМсАФсА▒сА╖сАбсАЬсАнсАпсААсА║ In time ,Out time сАЖсАнсАпсАХсА╝сАосА╕ сАЦсА▒сАмсА║сАХсА╝сАХсА▒сА╕сАБсА╝сАДсА║сА╕ сАЦсА╝сАЕсА║сАХсАлсАЮсАКсА║сБЛ сАбсАЬсАпсАХсА║сАбсАБсА╗сАнсАФсА║ сАРсААсА║сАЫсА▒сАмсААсА║сАЩсА╛сАпсАЩсА╗сАмсА╕сАФсА╛сАДсА╖сА║ сАЮсАРсА║сАЩсА╛сАРсА║сАСсАмсА╕ сАЮсАКсА╖сА║ Attendance Rule сАЩсА╗сАмсА╕сБК сАБсА╜сАДсА╖сА║сАЫсААсА║сАЩсА╗сАмсА╕сБК сАбсАБсА╗сАнсАФсА║сАХсАнсАпсАФсАмсАЫсАосАЩсА╗сАмсА╕сААсАнсАпсАЬсАКсА║сА╕ сАРсАБсАлсАРсАКсА║сА╕ сАЦсА▒сАмсА║сАХсА╝сАХсА▒сА╕сАЩсАКсА║сАЦсА╝сАЕсА║сАХсАлсАЮсАКсА║сБЛ сАСсАнсАпсА╖сАбсАХсА╝сАДсА║ сАбсАБсА╝сАмсА╕сАЮсА▒сАм сАЬсАпсАХсА║сАЖсА▒сАмсАДсА║сАФсАнсАпсАДсА║сАЮсАКсА╖сА║ сАбсАБсА╗сААсА║сАЩсА╗сАмсА╕сАбсАФсА▒сАЦсА╝сАДсА╖сА║ Press time сАЩсА╗сАмсА╕ сААсАнсАп сАХсА╝сАФсА║сАЬсАКсА║ сАХсА╝сАДсА║сАЖсАДсА║сАФсАнсА░сАДсА║сАБсА╝сАДсА║сА╕сБК Attendance – сАРсААсА║сАЫсА▒сАмсААсА║сАЩсА╛сАп сАбсАБсА╗сААсА║сАбсАЬсААсА║ сАбсАЩсА╗сАмсА╕сАбсАХсА╝сАмсА╕сААсАнсАп сАРсАХсА╝сАнсАпсАДсА║сАФсААсА║сАРсАКсА║сА╕ сАЮсАРсА║сАЩсА╛сАРсА║сАФсАнсАпсАДсА║сАБсА╝сАДсА║сА╕сБК Excel Format сАФсА╛сАДсА╖сА║ сАСсАКсА╖сА║сАЮсА╜сАДсА║сА╕сАФсАнсАпсАДсА║сАБсА╝сАДсА║сА╕сАЩсА╗сАмсА╕сААсАнсАп сАХсА╝сАпсАЬсАпсАХсА║сАФсАнсАпсАДсА║сАЩсАКсА║ сАЦсА╝сАЕсА║сАХсАлсАЮсАКсА║сБЛ
Attendance Process сАРсА╜сАДсА║ сАШсАм function сАРсА╜сАДсА║ сАХсАлсБАсАДсА║сАЩсАЬсА▓?
- Recalculation

- Attendance Editor

- Attendance Calculation

- Import Excel

- Download Template

Attendance Process сАРсА╜сАДсА║ сАбсААсА╗сАнсАпсА╕сАЮсААсА║сАЫсА▒сАмсААсА║сАЩсА╛сАпсАЫсА╛сАнсАЮсАКсА╖сА║ Application Option сАЩсА╗сАмсА╕
- Open Calculation ( if not/if )
- Not Save OTApprove In/Out Time In Employee Log ( if not/if )
- Auto Attendance Calculation ( if not/if )
- Open calculation
1.1. Open calculation option сААсАнсАп сАЩсАЮсАпсА╢сА╕сАСсАмсА╕сАШсА░сА╕сАЖсАнсАпсАЬсА╗сА╛сАДсА║
сАЫсА╜сА▒сА╕сАБсА╗сАЪсА║сАЬсАнсАпсААсА║сАЮсА▒сАм Period сААсАмсАЬ сАРсА╜сАДсА║ сААсА╝сАнсАпсАЫсА▒сАмсААсА║сАЩсАКсА╖сА║ сАФсА▒сА╖сАЩсА╗сАмсА╕-Working dayсАЩсА╗сАмсА╕сААсАнсАп Attendance process сАЫсА╛сАн Default First Form тАУ Manual Attendance Form сАРсА╜сАДсА║ сАЩсА╝сАДсА║сАЫсАЩсАКсА║сАЩсАЯсАпсАРсА║сАХсАлсБЛ сАХсАнсАРсА║сАЫсААсА║сАЩсА╗сАмсА╕сАФсА╛сАДсА╖сА║ Holiday сАЫсААсА║сАЩсА╗сАмсА╕сААсАнсАп Attendance calculationсАЬсАпсАХсА║сАХсА╝сАосА╕сАЩсА╛ сАЩсА╝сАДсА║сАЫсАХсАлсАЩсАКсА║сБЛ сАЫсА╜сА▒сА╕сАБсА╗сАЪсА║сАЬсАнсАпсААсА║сАЮсА▒сАм Period сААсАмсАЬ сАЮсАКсА║ 31 сАЫсААсА║ сАСсААсА║сААсА╗сА▒сАмсА║сАЬсАнсАпсА╖ сАЩсАЫсАХсАлсБЛ
1.2 Open calculation option сААсАнсАп сАЮсАпсА╢сА╕сАЩсАКсА║сАЖсАнсАпсАЬсА╗сА╛сАДсА║
сАЫсА╜сА▒сА╕сАБсА╗сАЪсА║сАЬсАнсАпсААсА║сАЮсА▒сАм Period сААсАмсАЬсАЫсА╛сАн сАЫсААсА║сАЩсА╗сАмсА╕сААсАнсАп сААсА╝сАнсАпсАЫсА▒сАмсААсА║сАЮсАКсА║ сАЦсА╝сАЕсА║сАЕсА▒ сАЩсАЫсА▒сАмсААсА║сАЮсАКсА║ сАЦсА╝сАЕсА║сАЕсА▒ сАЦсА▒сАмсА║сАХсА╝ сАХсА▒сА╕сАХсАлсАЩсАКсА║сБЛ сАЮсАнсАпсА╖сАЮсА▒сАмсА║ Attendance CalculationсААсАнсАп сАЬсАпсАХсА║сАХсА▒сА╕сАЫсАХсАлсАЩсАКсА║сБК 31 сАЫсААсА║сАСсААсА║сААсА╗сА▒сАмсА║ сАЬсАнсАпсА╖сАЩсАЫсАХсАлсБЛ
- Not Save OTApprove In/Out Time In Employee Log
2.1 Option сААсАнсАп сАЩсАЮсАпсА╢сА╕сАСсАмсА╕сАШсА░сА╕сАЖсАнсАпсАЬсА╗сА╛сАДсА║
OT Request сАЩсА╗сАмсА╕сАЩсА╛ Request In time, Out time сАЩсА╗сАмсА╕сААсАнсАп Employee Log сАРсА╜сАДсА║ сАЩсАЮсАнсАЩсА║сА╕сАСсАмсА╕сАХсАлсБК сАЩсАЮсАнсАЩсА║сА╕сАСсАмсА╕тАМсАЮсА▒сАмсААсА╝сА▒сАмсАДсА╖сА║ сАСсАнсАп log сАЩсА╗сАмсА╕сААсАнсАп Attendance process сАЫсА╛сАн Manual Attendance Form сАРсА╜сАДсА║ сАЩсА╝сАДсА║сАЫсАЩсАКсА║ сАЩсАЯсАпсАРсА║сАХсАлсБЛсАЮсАнсАпсА╖сАЮсА▒сАмсА║ OT сАФсА╛сАДсА╖сА║сАЖсААсА║сАЕсАХсА║сАЮсА▒сАм attendance rule-Column сАФсАмсАЩсАКсА║сАЩсА╗сАмсА╕ сАбсА▒сАмсААсА║сАРсА╜сАДсА║сАРсА▒сАмсА╖ сАЮсААсА║сАЖсАнсАпсАДсА║сАЮсАКсА╖сА║ OT value сАЩсА╗сАмсА╕сААсАнсАп сАЩсА╝сАДсА║сАЫсАЩсАКсА║сАЦсА╝сАЕсА║сАХсАлсАЮсАКсА║сБЛ
2.2 Option сААсАнсАп сАЮсАпсА╢сА╕сАСсАмсА╕сАЬсА╗сА╛сАДсА║
OT Request сАЩсА╗сАмсА╕сАЩсА╛ Request In time, Out time сАЩсА╗сАмсА╕сААсАнсАп Employee Log сАРсА╜сАДсА║сАЮсАнсАЩсА║сА╕сАСсАмсА╕сАЮсА▒сАмсААсА╝сА▒сАмсАДсА╖сА║ Attendance process сАЫсА╛сАн Manual attendance form сАРсА╜сАДсА║ Duty сБАсАДсА║сАБсА╗сАнсАФсА║сАСсААсА║сАЕсА▒сАмсАФсА▒сАХсАлсАА In Time сАРсА╜сАДсА║ сАЦсА▒сАмсА║ сАХсА╝сАЩсАКсА║сАЦсА╝сАЕсА║сАХсАлсАЮсАКсА║сБЛ сАбсАЕсА▒сАмсАЖсАпсА╢сА╕ сБАсАДсА║сАБсА╗сАнсАФсА║ сАЖсАнсАпсАРсАмсАСсААсА║ сАХсАнсАпсАЕсА▒сАмсАФсА▒сАХсАлсАА сАХсА╝сАосА╕сАБсА▓сА╖сАРсА▓сА╖сАФсА▒сА╖ сБП Out Time сАРсА╜сАДсА║ сАЦсА▒сАмсА║сАХсА╝сАФсА▒сАЬсАнсАЩсА╖сА║ сАЩсАКсА║сАЦсА╝сАЕсА║сАХсАлсАЮсАКсА║сБЛ Attendance Editor сАРсА╜сАДсА║сАРсА▒сАмсА╖ сАбсАБсА╗сАнсАФсА║сАЩсА╗сАмсА╕сААсАнсАп Manually сАбсАФсААсА║сАЫсА▒сАмсАДсА║ сАбсАФсА▒сАФсА▓сА╖ сАЦсА▒сАмсА║сАХсА╝сАФсА▒сАХсАлсАЩсАКсА║сБЛ┬а
┬а ┬а ┬а 3.Auto Attendance Calculation┬а
3.1 Auto Attendance Calculation сААсАнсАп сАЩсАЮсАпсА╢сА╕сАСсАмсА╕сАШсА░сА╕сАЖсАнсАпсАЬсА╗сА╛сАДсА║
Attendance process сААсАнсАп сБАсАДсА║сАЬсАнсАпсААсА║сАХсА╝сАосА╕сАЖсАнсАпсАХсАлсАА Default Manual Attenance Form сАХсАпсА╢сАЕсА╢ сАбсАРсАнсАпсАДсА║сА╕ Blank сАЦсА╝сАЕсА║сАФсА▒сАХсА╝сАосА╕ сАЬсАнсАпсАБсА╗сАДсА║сАЮсАКсА╖сА║ сААсАмсАЬсАФсА╛сАДсА╖сА║ сАЬсА░сАЩсА╗сАмсА╕сААсАнсАп сАЫсА╜сА▒сА╕сАБсА╗сАЪсА║сАЫсА╛сАмсАЦсА╜сА▒сАЬсАнсАпсААсА║сАЬсА╗сА╛сАДсА║ сАбсАЬсАпсАХсА║сБАсАДсА║сАБсА╗сАнсАФсА║/сАСсА╜сААсА║сАБсА╗сАнсАФсА║сАЩсА╗сАмсА╕сААсАнсАп Default сАбсАЫ сАЦсА▒сАмсА║сАХсА╝сАХсА▒сА╕сАЩсА▓сА╖сАЬсАКсА║сА╕ Attendance сАФсА╛сАДсА╖сА║ сАБсА╗сАнсАРсА║сАЖсААсА║сАСсАмсА╕сАЮсА▒сАм сАЮсАРсА║сАЩсА╛сАРсА║сАБсА╗сААсА║ сАРсАнсАпсАДсА║ (Column) сАЩсА╗сАмсА╕сАРсА╜сАДсА║сАРсА▒сАмсА╖ сАФсАмсАЫсАосАЩсА╗сАмсА╕/сАЩсАнсАФсАЕсА║сАЩсА╗сАмсА╕/сАЫсААсА║сАЩсА╗сАмсА╕ сАЩсА╛сАм сАЩсА╛сАмсА╕сАФсА▒сАХсАлсАЩсАКсА║сБЛ сАСсАнсАпсАЮсАРсА║сАЩсА╛сАРсА║сАБсА╗сААсА║сАЩсА╗сАмсА╕сААсАнсАп сАЩсА╛сАФсА║сАбсА▒сАмсАДсА║ сАЩсАЦсА╝сАЕсА║сАЩсАФсА▒ сАРсА╜сААсА║сАБсА╗сААсА║сАБсА╝сАДсА║сА╕(Attendance Calculation) сАЖсАнсАпсАРсАмсААсАнсАп Manually сАЬсАпсАХсА║сАХсА▒сА╕сАЫсАХсАлсАЩсАКсА║сБЛ┬а
3.2 Auto Attendance Calculation сААсАнсАп сАЮсАпсА╢сА╕сАСсАмсА╕сАЬсА╗сА╛сАДсА║
Attendance process сААсАнсАп сБАсАДсА║сАЬсАнсАпсААсА║сАХсА╝сАосА╕сАЖсАнсАпсАХсАлсАА сАЬсААсА║сАЫсА╛сАн сАЫсА▒сАмсААсА║сАЮсАКсА╖сА║ сАФсА▒сА╖сАбсАРсА╜сААсА║сААсАнсАп сАРсА╜сААсА║сАБсА╗сААсА║ сАФсА▒сАЩсАКсА║ сАЦсА╝сАЕсА║сАХсАлсАЮсАКсА║сБЛ Success :0 % Pending :0 % Retry :0 % Fail :0 % сАЖсАнсАпсАХсА╝сАосА╕ сАРсА╜сААсА║сАБсА╗сААсА║сАЩсА╛сАп сАбсАБсА╝сА▒сАбсАФсА▒сААсАнсАп сАЦсА▒сАмсА║сАХсА╝сАФсА▒сАЩсА╛сАмсАЦсА╝сАЕсА║сАХсА╝сАосА╕ Calculation Stop сАЖсАнсАпсАРсАм сААсАнсАп сАФсАнсАпсАХсА║сАЬсАнсАпсААсА║сАЩсАКсА║сАЖсАнсАпсАХсАлсАА сАРсА╜сААсА║сАБсА╗сААсА║сАЩсА╛сАпсАЫсАХсА║сАЮсА╜сАмсА╕сАХсАлсАЬсАнсАЩсА╖сА║сАЩсАКсА║сБЛ
ActiveсАЦсА╝сАЕсА║сАЮсАКсА╖сА║ сАЮсА░сАЩсА╗сАмсА╕сААсАнсАпсАЮсАм сАРсА╜сААсА║сАХсА▒сА╕сАХсАлсАЩсАКсА║сБЛ
Attendance Process Details
Go to Left Menu Panel >> Find and Click Time Attendance >>Click Attendance Process

Essential Steps (1&2)
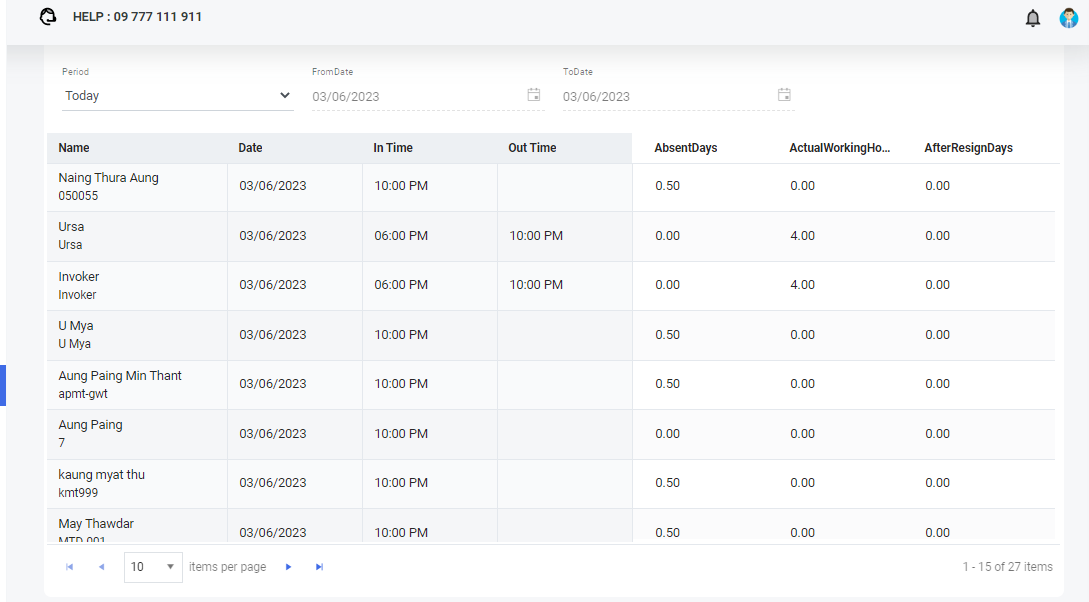
In Attendance Process; (Time Attendance > Attendance Process)
Step 1: Choose Period >> Today/ This Week/ This Month/ Last Week/ Last Month/ Custom

Step 2: Choose Employee by Organization structure or Filter by Employee >> Click Search Button
1.Manual Attendance Form
Manual Attendance form сАЖсАнсАпсАЮсАКсА║сАЩсА╛сАм Attendance process сАРсА╜сАДсА║ Default Page сАбсАФсА▒сАФсА▓сА╖сАРсАКсА║сАЫсА╛сАнсАХсАлсАЮсАКсА║сБЛ сАбсАЬсАпсАХсА║ сБАсАДсА║сАБсА╗сАнсАФсА║/сАСсА╜сААсА║сАБсА╗сАнсАФсА║сАЩсА╗сАмсА╕сБК сАБсА╜сАДсА╖сА║сАЩсА╗сАмсА╕сБК сАбсАБсА╗сАнсАФсА║сАХсАнсАпсАФсАмсАЫсАо сАЩсА╗сАмсА╕ сАЕсАЮсАКсА║сАРсАнсАпсА╖сАбсАХсА╝сАДсА║ Attendance сАФсА╛сАДсА╖сА║сАЖсАнсАпсАДсА║сАЮсА▒сАм Rule сАЩсА╗сАмсА╕сААсАнсАпсАХсАл сАЦсА▒сАмсА║сАХсА╝сАХсА▒сА╕сАЩсАКсА║сАЦсА╝сАЕсА║сАХсАлсАЮсАКсА║сБЛ
After doing Essential Step 1 & 2;
Then In Time/Out Time Columns and Leave Name/ Leave Type Columns and other attendance rules columns would be shown in the Form.
1.1: How to fill the press time manually in Manual Attendance Form?
Click the Blank box that under the column name is In Time or Out Time
- Please fill the Duty In Time or Out Time
- Left Click on any blank place in this page
- тАЬ Attendance Process┬а Save Success тАЬ pop-up will be shown at the right top of the Form.

- Then Click Attendance Calculation.
Sample Video
1.2: How to add and edit the leave name and leave type in Manual Attendance Form?
If you want to add the Leave,
Click the Blank box that under the column names are Leave Name and Leave Type.(Right Side in Form)
- Please choose the Leave Name and Leave Type
- Left Click on any blank place in this page
- тАЬ Attendance Process┬а Save Success тАЬ pop-up will be shown at the right top of the Form.
- Then Click Attendance Calculation.
If you want to edit the Leave name or Leave Type,
Click Leave Name or Leave Type (Right Side in Form)
- Please choose again Leave Name or Leave Type in drop down box
- Left Click on any blank place in this page
- тАЬ Attendance Process┬а Save Success тАЬ pop-up will be shown at the right top of the Form.
- Then Click Attendance Calculation
Sample Video
1.3: How to add OT hours or OT minutes in Manual Attendance Form?
Click OT under the Attendance Rule Name like as ConfirmOTMin, OffdayOT, HolidayOT (Right Side in Form)
- Please write the OT hours or minutes.
- Left Click on any blank place in this page
- тАЬ Attendance Process┬а Save Success тАЬ pop-up will be shown at the right top of the Form.
- Then Click Lock icon where the middle in these Form.

- тАЭAttendance Process Lock SuccessтАЭ pop-up will be shown after click the Lock icon.

- Then Click Attendance Calculation.
Sample Video
Do and DonтАЩt Tips in Manual Attendance Form
#1. Please check the internet line before you edit the attendance press time or Leave or OT.
#2. Please look carefully at the right top pop-up box after edit or add the attendance press times or leave or OT.
#3. Please fill out the leave carefully because other leave restrictions didnтАЩt apply to the manual process.
#4. Please do the Attendance calculation before you change the next page.
#5. Please do the recalculation and Attendance calculation after changed the Roster.
#6. Please calculate again even if you did Recalculation and Attendance Calculation but you have changed the Roster.
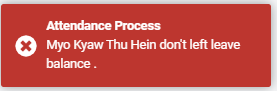
#7. The Red Pop-up box will be dropped if you choose the wrong. Sample: donтАЩt left leave balance.
#8. The тАЬ Attendance Process┬а Save Success тАЬ pop-up will not be shown while you fill in the press times and lost the internet connection.
2.Attendance Editor Form
Attendance editor form сАЖсАнсАпсАРсАмсАЮсАКсА║ Manual Attendance сАЩсА╛ сАбсАБсА╗сАнсАФсА║сАЩсА╗сАмсА╕сААсАнсАп сАЦсА╗сААсА║сАФсАнсАпсАДсА║/ сАЦсА╗сА▒сАмсААсА║сАФсАнсАпсАДсА║/ сАбсАЮсАЕсА║сАСсАКсА╖сА║сАФсАнсАпсАДсА║сАХсАлсАЮсАКсА║сБЛ сАбсАЬсАпсАХсА║ сБАсАДсА║сАБсА╗сАнсАФсА║ (Press time) сАЩсА╗сАмсА╕ сААсАнсАп сАФсАнсАпсАХсА║сАСсАмсА╕сАЮсАКсА╖сА║ сАбсААсА╝сАнсАЩсА║сАЫсА▒сАбсАРсАнсАпсАДсА║сА╕ сАЦсА▒сАмсА║сАХсА╝сАХсА▒сА╕сАЩсАКсА║сАЦсА╝сАЕсА║сАХсА╝сАосА╕ сАЩсАКсА║сАЮсАКсА╖сА║ Device сАЩсА╛ сБАсАДсА║сАЮсАКсА║сАЖсАнсАпсАРсАмсААсАнсАп сАбсАЬсАпсАХсА║сБАсАДсА║сАБсА╗сАнсАФсА║(press time) сАЦсА▒сАмсА║сАХсА╝сАЫсАмсАРсА╜сАДсА║
![]() сАбсАЕсАнсАЩсА║сА╕сАФсА▓сА╖ сАЖсАнсАпсАХсАлсАА Mobile App сАЩсА╛ сБАсАДсА║сАРсАмсАЦсА╝сАЕсА║сАХсА╝сАосА╕┬а
сАбсАЕсАнсАЩсА║сА╕сАФсА▓сА╖ сАЖсАнсАпсАХсАлсАА Mobile App сАЩсА╛ сБАсАДсА║сАРсАмсАЦсА╝сАЕсА║сАХсА╝сАосА╕┬а
![]() сАбсАХсА╝сАмсАФсА▓сА╖ сАЖсАнсАпсАХсАлсАА Fingerprint/Bluetooth Device сАЩсА╛ сБАсАДсА║сАРсАмсАЦсА╝сАЕсА║сАХсАлсАЮсАКсА║сБЛ
сАбсАХсА╝сАмсАФсА▓сА╖ сАЖсАнсАпсАХсАлсАА Fingerprint/Bluetooth Device сАЩсА╛ сБАсАДсА║сАРсАмсАЦсА╝сАЕсА║сАХсАлсАЮсАКсА║сБЛ
![]() сАбсАФсААсА║сАЫсА▒сАмсАДсА║ сАФсА▓сА╖ сАЖсАнсАпсАХсАлсАА Manually сАСсАКсА╖сА║сАРсАмсАЦсА╝сАЕсА║сАХсАлсАЮсАКсА║сБЛ
сАбсАФсААсА║сАЫсА▒сАмсАДсА║ сАФсА▓сА╖ сАЖсАнсАпсАХсАлсАА Manually сАСсАКсА╖сА║сАРсАмсАЦсА╝сАЕсА║сАХсАлсАЮсАКсА║сБЛ
After doing Essential Step 1 & 2;
Click Attendance Editor >> Click Preview

Functions of Attendance Editor
#1. Delete, Inactive & Active for Press Times
#2. Can change the view mode by Shift or Day
#3. Generate Attendance In Time/Out Time by Custom Time or Assigned Shift.
#4. Attendance In Time/Out Time import by Excel
2.1: How to delete, inactive, active for Press Times
After doing Essential Step 1 & 2;
Step 1. Click Attendance Editor >> Click Preview
Step 2. Click the small arrow down icon beside of press time>> Delete/Inactive
Step 3. Then Click Preview.
How to make Active from Inactive of the press time?
Step 4. Click the check box on Inactive at the Left-Top side of Form.
![]() >>
>>![]()
Step 5. Then Click the small arrow down icon ![]() beside of press time >>┬а Active
beside of press time >>┬а Active
Step 6. Then Click Preview.
Sample Video
Tips:
- You canтАЩt delete the logs from Mobile Apps, Fingerprint device and Bluetooth Device!!You can do the inactive for them.┬а
- You can delete the logs manually that means fill by user or approve the attendance request in time or out time. If the log is coming from the request, the request record has been still shown in Attendance Approve Form.
2.2: How to change the view by shift or day
After doing Essential Step 1 & 2;
Step 1. Click Attendance Editor >> Click Preview
Step 2. Click More Options┬а
Step 3. Choose > View By Date / View By Shift
Sample Video
2.3: How to generate attendance In Time and Out Time by custom time or assigned shift & how to add press time?
Generate Attendance┬а
After doing Essential Step 1 & 2;
Step 1. Click Attendance Editor >> + Add Press Time
By Custom Time
Step 2. For In Time >> Check on In time only >> choose Time
For Out Time >> Check on Out time only >> choose Time
By Assigned Shift
Step 3. For In Time >> Check on In time only >> Check on By Assigned Shift In Time
For Out Time >> Check on Out time only >> Check on By Assigned Shift Out Time
If you want to fill the Attendance for Offday and Gazette Holidays,
Step 4. Slide On >> Include Offday and Gazette Holidays
Step 5. Then can type the comment in Comment Box.
тАЭAttendance Process Generate Attendance SuccessтАЭ pop-up will be shown after Click Generate.

Step 6. Click Preview the generated Data.
Sample Video
Add press time
After doing Essential Step 1 & 2;
Step 1. Click Attendance Editor >> + Add Press Time
Step 2. Choose Add Press Time Tab in Pop-Up Box
Step 3. Choose Date & Time.
Step 4. Can type comments in the Comment box.
How to make for show the press time?
Step 5. Click Manual Attendance
Step 6. Click Recalculation > Click Attendance Calculation
(Then check again in Attendance Editor.)
Sample Video
2.4: How to import Attendance In Time and Out Time by Excel?
After doing Essential Step 1 & 2;
Step 1. Click Attendance Editor >> + Add Press Time
Step 2. Choose Import Excel File Tab in Pop-Up Box
Step 3. Click Download Template ![]() (The Excel file will drop into the Download Folder.)
(The Excel file will drop into the Download Folder.)
Step 4. Open the Downloaded excel template file named AttendanceInTimeOutTimeImport.
Step 5. Fill Attendance press time data.
![]()
Tip: EnrollNumber & AttendanceDate are essential fields.
Step 6. Choose Period > Today/ This Week/ This Month/ This Year/ Last Week/ Last Month/ Last Year/ Custom
Step 7. Click Import ![]() .
.
Step 8. Click Browse File┬а ![]() >> Find the file and Double click on the file or select the Import Excel data file and Click Open.
>> Find the file and Double click on the file or select the Import Excel data file and Click Open.
Step 9. Click Validate Data.
Step 10. Click Import Data.
Sample Video
3.Leave Import by Excel
System сАЩсА╛ сАЮсАРсА║сАЩсА╛сАРсА║сАСсАмсА╕сАЮсАКсА╖сА║ template сАбсАРсАнсАпсАДсА║сА╕ Excel format сАФсА▓сА╖ сАСсАКсА╖сА║сАЮсА╜сАДсА║сА╕сАЬсАнсАпсА╖сАЫсАЩсАКсА║сАЦсА╝сАЕсА║сАХсАлсАЮсАКсА║сБЛ
Attendance Process> Manual Attendance form
After doing Essential Step 1 & 2;
Step 1. Click the Download Template Icon ![]() (The Excel file will drop into the Download Folder.)
(The Excel file will drop into the Download Folder.)
Step 2. Open the Downloaded excel template file named AttendanceImport.
Step 3. Fill Leave data.

Step 4. Click the Import Excel icon ![]() .
.
Step 5. Click Browse File┬а ![]() >> Find the file and Double click on the file or select the Import Excel data file and Click Open.
>> Find the file and Double click on the file or select the Import Excel data file and Click Open.
Step 6. Click Validate Data.
Step 7. Click Import Data
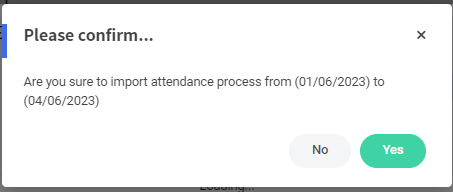
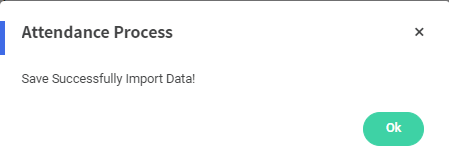
Step 8. Click тАЬYesтАЭ in Please Confirm pop-up box > Click тАЬOKтАЭ in Save Successfully Data box.
Step 9. Click Search to look the Leave Data.
Full Sample Video
Reports
Attendance/Leave/OT сАФсА╛сАДсА╖сА║сАЮсААсА║сАЖсАнсАпсАДсА║сАЮсА▒сАм reporting сАбсАБсА╗сААсА║сАбсАЬсААсА║сАЩсА╗сАмсА╕сААсАнсАп Attendance Process сАРсА╜сАДсА║ Attendance Calculation сАЬсАпсАХсА║сАХсА╝сАосА╕сАФсА▒сАмсААсА║ Attendance Data сАбсАБсА╗сААсА║сАбсАЬсААсА║сАЩсА╗сАмсА╕сААсАнсАп сАЩсА╛сАФсА║сАЩсА╛сАФсА║сААсАФсА║сААсАФсА║ сААсА╝сАКсА╖сА║сАЫсА╛сАпсАФсАнсАпсАДсА║сАЩсАКсА║ сАЦсА╝сАЕсА║сАХсАлсАЮсАКсА║сБЛ┬а
Open the Global TA Cloud Web URL in a web browser.
In the left menu panel, go to тАЬReportтАЭ, then choose the report as you need.
- Attendance Detail
- Attendance Summary
- Attendance Log
- Break Time Summary
- Leave Status Report
- Attendance Status Report
- OT Status Report
- Absenteeism Report
Update Lists
New function changes for 1.2: How to add and edit the two leave names and leave types in the Manual Attendance Form?
If you want to add the Leave,
>> Click on Add Leave Name ![]() (Right Side in Form)
(Right Side in Form)
>> Drop Leave Setup Box, please choose the Leave Name and Leave Type.
If you want to add the two leave names in a day,
>>First choose >> Morning Leave for the morning leave name
>>Second click >> + Add Evening Leave ![]() for the evening leave name
for the evening leave name
(Remark: If you want to add only the same leave name choose >> Full day (Add Evening Leave will not be shown))
>>Click Save >> then тАЬ Attendance Process┬а Save Success тАЬ pop-up will be shown at the right top of the Form.

>Then Click Attendance Calculation.
If you want to edit/remove the Leave name or Leave Type,
>> Click on Add Leave Name![]() (Right Side in Form)
(Right Side in Form)
>> Drop Leave Setup Box, please choose the Leave Name and Leave Type for editing and choose Select Leave Name for removing.
If you want to edit/remove the two leave names in a day,
>First choose >> Select Leave Name for the morning leave name
>Second click >> – Remove Evening Leave ![]() for the evening leave name
for the evening leave name
>> Click Save >> then тАЬ Attendance Process┬а Save Success тАЬ pop-up will be shown at the right top of the Form.
>> Then Click Attendance Calculation.
Sample Video :